Shadow of the site model prior to my birthday date

1. This is what the basic box should look like.
 2. You have to make sure that your model is in the right place on Earth, and that it is oriented the right direction. For that, in the menus you go to Window/Model Info  3. Now you are ready to turn on the shadows. In the menus, go to View/Shadows 
Use this panel to set June 21, and in turn 9am, 12 noon, 3pm as shown.
4. Investigate the shadows. It's pretty simple, hey?  5. Now modify the model to have an overhang over the window. In the model I have made, I have given the overhang a nominal 100mm thickness, so I can push and pull it using the 'Extrude' tool. Before you set up the key dates and times, the model should look like this:  6. Now reset the shadows for your first critical time and date. Remember: for 10am Daylight Saving, the solar time is 9am, and so on. From now on, I will talk in solar time.
Think about it. The 'depth' of the overhang will be determined by the 'smallest' VSA. That should be at noon for this date. But if you don't believe me, slide the time slider, and see when the overhang shadow is closest to the window.
So, use your extrude tool to push back the overhang until it just 'kisses' the bottom of the glass at noon.
 7. Reset the time for 9am, and push the eastern side of the overhang back until the shadow just kisses the eastern side of the window. Repeat for the western side at 3pm. 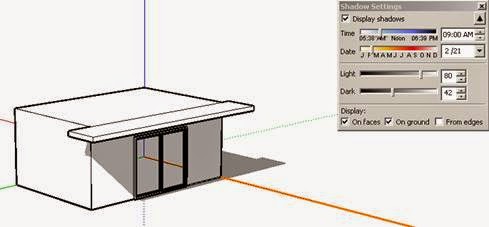 8. Note how far the overhang has to extend to the sides. And finally, check how much sun 'sneaks' into the window from the sides at other times. It's not a lot, is it?
VIDEO TUTORIAL
|


